
Guide to Rearing Chicks
Raising chicks—whether hatched under a broody hen or in an incubator—is one of the most rewarding parts of keeping chickens. However, young chicks require proper care to ensure healthy growth and development.
This guide will walk you through the essentials of rearing chicks, using either a broody hen or a brooder setup.
Using a Broody Hen to Hatch and Rear Chicks
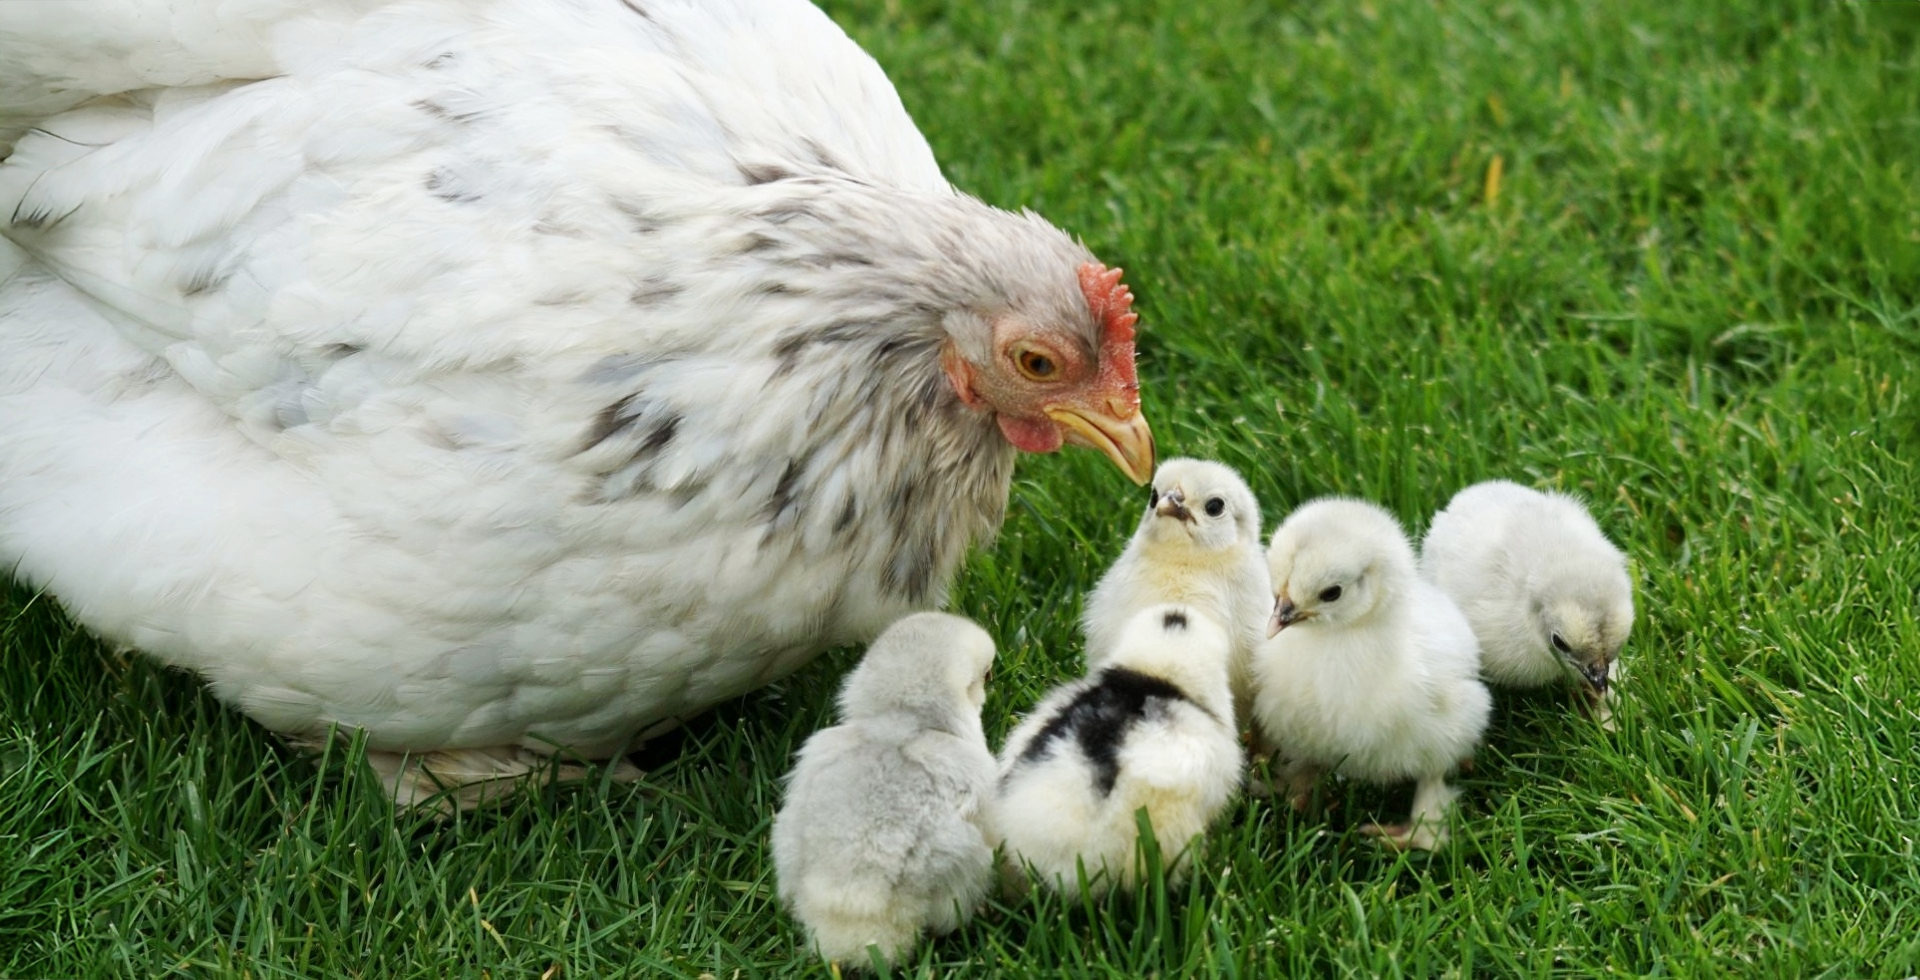
Most broody hens make excellent mothers and will care for their chicks instinctively.
Nest Setup
- The nest should be in a dry, draft-free location with plenty of bedding—straw or hay works best.
- Avoid disturbing the hen during hatching; she will provide all the warmth her chicks need, as long as they can all fit under her.
Food & Water
- Once the chicks hatch, make sure food and water are freely available, using feeders and drinkers suitable for chicks (see details below).
- In rare cases, hens may become aggressive or abandon their chicks. Always have a brooder prepared in advance, just in case.
Introducing Chicks to a Broody Hen
If you have a broody hen but no fertilised eggs under her, you can sometimes introduce day-old chicks for her to rear.
How to Do It
- Chicks should be as young as possible—ideally under 2–3 days old.
- Introduce the chicks at night: carefully remove any eggs from under the hen and replace them with the chicks.
- Do not let the hen see the chicks before they’re under her, as this can trigger rejection.
Be aware:
not all hens will accept chicks. Watch closely the next morning. If the hen is aggressive or refuses to care for them, move the chicks into a pre-heated brooder immediately.
Rearing Chicks in a Brooder
Whether you’ve hatched chicks in an incubator or purchased day-olds, a brooder setup is essential for their early care.
Transporting Chicks
- When collecting day-old chicks, use a small, insulated box to keep them warm. Scrunched kitchen roll or hay makes ideal bedding.
- Durham Hens provides transport boxes for customers buying chicks from us.
- Place chicks in a pre-heated brooder as soon as you arrive home.
The Brooder Setup
Heat Source
- Newly hatched chicks need a starting temperature of 35°C, which should be gradually reduced over the next 6 weeks.
- The best way to judge chick comfort is by their behaviour:
- Too cold: huddling under the heat source.
- Too hot: spread out, avoiding the heat source.
- Comfortable: quietly exploring, evenly spread.
🔥Do not use standard household light bulbs.
They don’t produce sufficient or consistent heat, and many cheap brooder kits on sites like eBay use them unsafely.
Types of Heat Sources
- Heat Lamps: Hang safely above chicks, not too close.
- Infrared bulbs: Provide heat and light.
- Ceramic bulbs: Provide heat only (longer lasting and more efficient).
- Contact Brooders (e.g. Brinsea EcoGlow):
- Mimic the warmth of a hen’s body.
- Lower fire risk and use less power.
- Adjustable height—set low for new chicks and raise as they grow.
Positioning the Brooder
- Keep it away from draughts, direct sunlight, radiators, and cold buildings.
- Watch the background temperature, especially at night if your heating switches off.
- Flooring should be non-slip to prevent leg problems like splayed leg:
- Corrugated cardboard or kitchen roll over newspaper is ideal at first.
- As chicks grow, you can switch to wood shavings.
- 🐥 At Durham Hens, we supply brooder kits with Brinsea EcoGlow heaters.
Feeders and Drinkers
- Use a chick-specific feeder and a narrow-lipped drinker to prevent drowning. Recommended Chick Drinker.
- If using a wider drinker, place clean pebbles or marbles in the water to keep chicks safe.
Bedding
Temperature Timeline
Age Recommended Temperature
Week 1 35°CWeek 2 32°C
Week 3 29°C
Week 4 26°C
Week 5 23°C
Week 6 20°C or room temp
By 6–8 weeks, chicks should be fully feathered and able to go outside, depending on the weather. Provide plenty of clean, dry bedding to keep them warm at night.
Food and Grit
Feeding Chicks
- Provide chick starter crumb or mash from day one.
- By week 3, their appetite increases significantly—ensure feed is always available.
- Top-quality chick feed helps avoid nutritional deficiencies like wry neck.
Grit for Digestion
- Offer chick flint grit in a small dish—don’t mix it into the food.
- Grit helps chicks digest food, especially once they begin foraging.
Chick Health
Worming
- From 8–10 weeks, chicks should be wormed regularly once they’re outdoors.
- We recommend Verm-X Poultry Liquid.
Parasites
Provide a dust bath with Red Mite Powder
to help chicks manage mites and lice naturally.
Coccidiosis
A common parasitic disease affecting young birds.
- Use Medicated Chick Crumb (and then) Growers Mash, which contains a coccidiostat, to help prevent it.
- Signs to watch for:
- Hunched posture
- Weight loss ("going light")
- Blood in droppings
If you suspect coccidiosis:
- Clean housing with poultry-safe disinfectant
- Isolate and monitor affected chicks
Vaccinations
- Home-reared chicks cannot be vaccinated for diseases like Marek’s. Vaccine doses are sold in large quantities (e.g. 2,000 doses) and must be used immediately.
- Marek’s Disease: A viral illness causing internal tumours and paralysis. Usually affects birds aged 16–30 weeks. There is no treatment.
Wry Neck or Stargazing
- This can indicate Marek’s, head trauma, or vitamin E deficiency.
- In most cases, a vitamin supplement corrects the problem.
- Feeding high-quality chick crumb helps prevent this.
Introducing Young Birds to Your Flock
When your chicks reach at least 18 weeks or are fully grown, they can be introduced to your existing flock.
What to Expect
- A temporary pecking order will need to be established.
- Minor pecking and scuffles are normal.
- Introduce gradually and provide multiple feeding and drinking stations to reduce competition.
📘
For more detailed advice, see our Guide to Keeping Chickens.